

Creating Variants
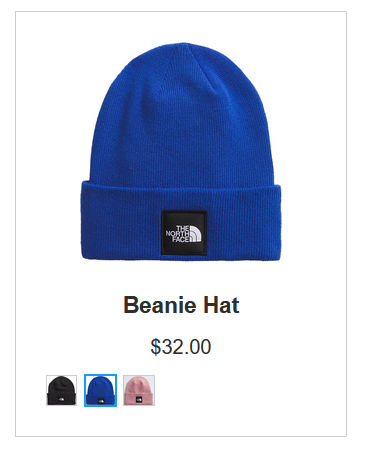
Example: A beanie with three variants: a blue version, a black version, and a pink version.
Overview
Variants are commonly used in HawkSearch to present multiple variations of a product within the same search result. Variants are most often used to allow for products with different sizes and colors to be grouped together; however, variants can be used in many ways according to your specific engine needs.
In this section, you'll learn how to create your own engine with variants. Note: Because you'll have to re-format and change the properties of various fields within the QuickStart environment, it's recommended to create a new, blank engine for this process. Furthermore, this feature is behind a feature toggle; in order to enable it, ask your CSD, Project Manager or any contact at HawkSearch to turn on the variant feature.
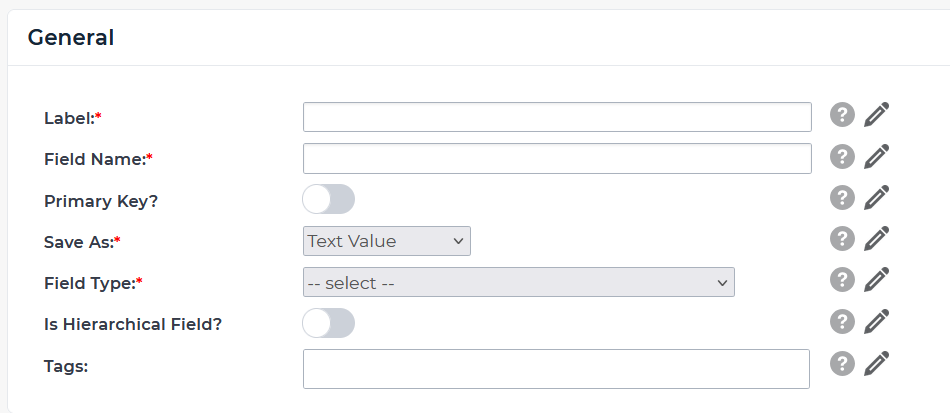
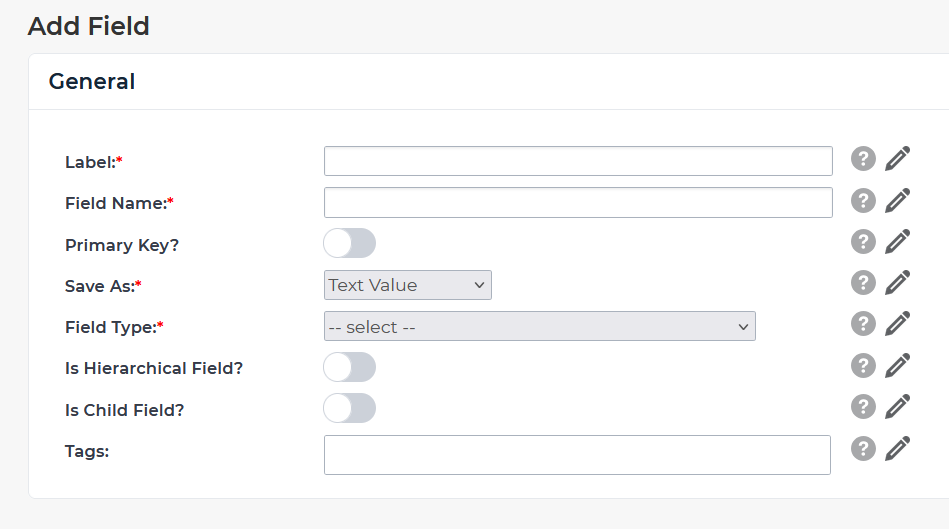
You'll know variants have been enabled when the Is Child Field? setting is available within the Add Field menu.
If you'd like to see variants at work without creating a new engine, skip to the section titled 'Rapid UI Example' to see a HawkSearch developer's sample engine.
Engine Setup
First, follow the QuickStart setup guide to create a new Blank Engine.
This documentation will use the following Postman collection to demonstrate how to utilize variants.
Variant Demo Postman Collection
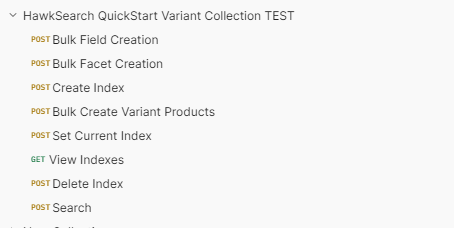
Once you download and open the collection, you should see the following page from within Postman:
Facets
First, you'll need to create your facets. Only one facet exists for this demonstration-- the brand facet. Facet creation is exactly like it is in Create Facets, however, you'll be using the following file instead:
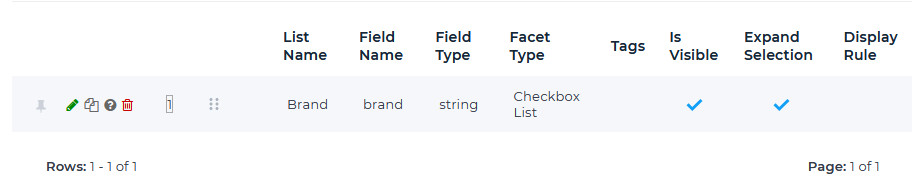
Use the Bulk Facet Creation endpoint within the Variant Demo postman collection to add your facet. To make sure it was added correctly, navigate to Workbench --> Data Configuration --> Facets. If successful, you should see the following facet within the Facet Administration page:
Fields:
Field creation follows a similar process. You'll use the following CSV to run the Bulk Field Creation endpoint within the Variant Demo postman collection.
Once again, it is wise to check within your engine to see if the Postman collection ran correctly. Navigate to Workbench --> Data Configuration --> Fields. If successful, you should see the following fields within the Field Administration page:

You might remember how the toggle Is Child Field? appeared when variants were added into your engine. Parent and Child fields are important to the implementation of variants.
When the “Is Child Field” toggle is disabled, the field is treated as a parent-level field. Parent-level fields represent attributes whose values remain consistent across all SKUs within a given product group, as well as across product groups in the catalog. For example, the brand field is typically defined at the parent level.
When the “Is Child Field” toggle is enabled, the field is treated as a child-level field. Child-level fields represent attributes that may vary among SKUs within the same product group. Common examples include color and size. By designating these attributes as child-level fields, you indicate that they are related and may differ across SKUs within a single product.
For this demo, the fields are broken down as such:
| Field Name | Is Parent? | Is Child? |
|---|---|---|
| key | ✓ | |
| name | ✓ | |
| sku_id | ✓ | |
| description | ✓ | |
| imageUrl | ✓ | |
| product_thumbnail | ✓ | |
| brand | ✓ | |
| product_color | ✓ | |
| price | ✓ | |
| url | ✓ |
Because sku_id, imageUrl, product_thumbnail, product_color, and price are enabled as child fields, different products in the same product category can vary in color and price. For example, the beanie product shown at the beginning of this document can be used to group multiple colors of beanies, and these different colors can each have their own price.
Which fields you'd like to vary between different products of the same type can differ depending on your storefront's needs -- there is no one way to configure variants.
Create Index
Next, you'll have to create an index for your engine. Send the Create Index endpoint, and copy the index name that is returned.
Index Variant Data
In order to add data into your engine, you'll need to replace the IndexName found within the body of Bulk Create Variant Products with the name of the index you created in the last step.
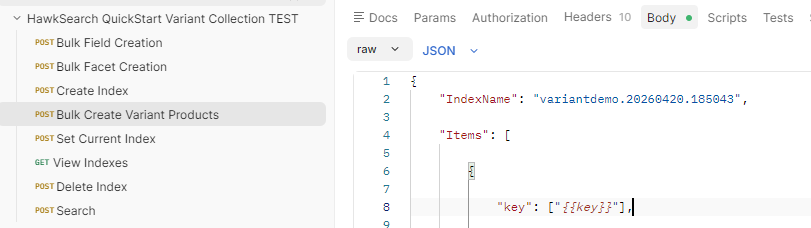
Location of the IndexName variable you'll need to replace.
Once this value has been replaced, run the Bulk Create Variant Products endpoint with the following CSV:
After you've successfully ran the Bulk Create Variant Products endpoint, you should see items appear within your Preview page. However, to see variants in action, you'll need to use Rapid UI.
Rapid UI Template:
If you're looking to preview the engine you just created, download the following Rapid UI template and substitute the bracketed fields with your engine information. Note: Make sure to use Microsoft Edge to open the following HTML file, or data might not display correctly on the webpage.
<!DOCTYPE html>
<html lang="en">
    <head>
        <meta charset="utf-8" />
        <title>HawkSearch Handlebars UI Demo (Variants)</title>
        <meta name="description" content="This is a demo of the HawkSearch Handlebars UI" />
        <meta name="viewport" content="width=device-width, initial-scale=1" />
        <meta name="robots" content="noindex" />
        <link
            href="https://uploads-ssl.webflow.com/616ef101d9f2a3350a5daaf5/617a70019e3990dcdc313a53_favico%2032x32px.png"
            rel="shortcut icon"
            type="image/x-icon"
        />
        <link href="https://uploads-ssl.webflow.com/616ef101d9f2a3350a5daaf5/617a7005e122ca51ac06961e_webclip%20256x256px.png" rel="apple-touch-icon" />
        <script type="text/javascript">
            var HawkSearch = HawkSearch || {};

            HawkSearch.config = {
                clientId: '[YOUR CLIENT ID HERE]',
                urlPrefixes: {
                    assets: 'https://test.hawksearch.net',
                    content: 'https://preview-test.hawksearch.net/[YOUR ENGINE NAME HERE]'
                },
                autocomplete: {
                    recommendationsEnabled: true
                },
                search: {
                    url: window.location.pathname,
                    endpointUrl: 'https://searchapi-test.hawksearch.net',
                    itemTypes: {
                        default: 'product'
                    }
                },
                fieldMappings: {
                    title: 'name'
                },
                variants: {
                    fieldMappings: {
                        id: 'sku_id',
                        imageUrl: 'imageurl',
                        color: {
                            title: 'product_color',
                            imageUrl: 'product_thumbnail'
                        }
                    }
                }
            };
        </script>
        <script src="https://cdn.jsdelivr.net/npm/@bridgeline-digital/[email protected]/dist/index.js" defer></script>
        <style type="text/css">
            body {
                font-family: Arial, Helvetica, sans-serif;
                font-size: 16px;
            }

            .layout-container {
                margin: 0 auto;
                min-width: 340px;
                max-width: 1280px;
            }

            hawksearch-search-field {
                display: block;
                margin: 0 0 30px 0;
            }
        </style>
    </head>

    <body>
        <div class="layout-container">
            <h1>HawkSearch Handlebars UI Demo (Variants)</h1>
            <hawksearch-search-field></hawksearch-search-field>
            <hawksearch-search-results></hawksearch-search-results>
            <hawksearch-recommendations widget-id="ae13755e-dce6-4329-b14a-0f582f3e5503"></hawksearch-recommendations>
        </div>
    </body>
</html>
Rapid UI Example:
If you'd like to quickly see variants at work without creating a new engine, the following Rapid UI example for Outdoor Demo with Variant can be downloaded and viewed. Note: Make sure to use Microsoft Edge to open the following HTML file, or data might not display correctly on the webpage.
<!DOCTYPE html>
<html lang="en">
    <head>
        <meta charset="utf-8" />
        <title>HawkSearch Handlebars UI Demo (Variants)</title>
        <meta name="description" content="This is a demo of the HawkSearch Handlebars UI" />
        <meta name="viewport" content="width=device-width, initial-scale=1" />
        <meta name="robots" content="noindex" />
        <link
            href="https://uploads-ssl.webflow.com/616ef101d9f2a3350a5daaf5/617a70019e3990dcdc313a53_favico%2032x32px.png"
            rel="shortcut icon"
            type="image/x-icon"
        />
        <link href="https://uploads-ssl.webflow.com/616ef101d9f2a3350a5daaf5/617a7005e122ca51ac06961e_webclip%20256x256px.png" rel="apple-touch-icon" />
        <script type="text/javascript">
            var HawkSearch = HawkSearch || {};

            HawkSearch.config = {
                clientId: '917caddd65ef4c96a7dad4bd82f6d09b',
                urlPrefixes: {
                    assets: '//dev.hawksearch.net',
                    content: '//preview-dev.hawksearch.net/outdoordemowithvarianttake2'
                },
                autocomplete: {
                    recommendationsEnabled: true
                },
                search: {
                    url: window.location.pathname,
                    endpointUrl: 'https://searchapi-test.hawksearch.net',
                    itemTypes: {
                        default: 'product'
                    }
                },
                fieldMappings: {
                    title: 'name'
                },
                variants: {
                    fieldMappings: {
                        id: 'sku_id',
                        imageUrl: 'imageurl',
                        color: {
                            title: 'product_color',
                            imageUrl: 'product_thumbnail'
                        }
                    }
                }
            };
        </script>
        <script src="https://cdn.jsdelivr.net/npm/@bridgeline-digital/[email protected]/dist/index.js" defer></script>
        <style type="text/css">
            body {
                font-family: Arial, Helvetica, sans-serif;
                font-size: 16px;
            }

            .layout-container {
                margin: 0 auto;
                min-width: 340px;
                max-width: 1280px;
            }

            hawksearch-search-field {
                display: block;
                margin: 0 0 30px 0;
            }
        </style>
    </head>

    <body>
        <div class="layout-container">
            <h1>HawkSearch Handlebars UI Demo (Variants)</h1>
            <hawksearch-search-field></hawksearch-search-field>
            <hawksearch-search-results></hawksearch-search-results>
            <hawksearch-recommendations widget-id="ae13755e-dce6-4329-b14a-0f582f3e5503"></hawksearch-recommendations>
        </div>
    </body>
</html>
What's Next:
Once you've previewed your engine within Rapid UI, you've taken your first step to utilizing variants within HawkSearch! While we've used only a couple of child fields in this demonstration, variants can be expanded on with the changing or creation of child fields. For this demo, variants were used for color and price, but they can be used for other fields such as:
- Descriptions: Adding different descriptions depending on the color of a product selected.
- Size: Differentiating between sizes of a product to change price, description, or the thumbnail.
Now that you've completed this tutorial, feel free to customize your engine further, or explore other pages within the Play In Your Sandbox tab.
Updated 18 days ago