
Rapid UI Basics
Overview
There is detailed documentation in the Rapid UI Docs section, so this page is to explain the simple basics for setting up the basic components of the Rapid UI Framework using handlebars js.
Sample Code
There is sample code available in the Rapid UI Examples section.
Configuration
The first step is to add the reference to the Rapid UI framework and to set up the Hawksearch.config object that is used by the Rapid UI Framework. The first setting you need to configure within Hawksearch.config is the clientId. Finding the clientId is described here
Basics
Below is the barebones script to reference and configure Rapid UI on your website:
v6
<head>
  <script type="module" src="https://cdn.jsdelivr.net/npm/@bridgeline-digital/hawksearch-handlebars-ui@latest/dist/hawksearch-handlebars-ui.min.js"></script>
  <script type="text/javascript">
    addEventListener('hawksearch:loaded', () => {
      HawkSearch.init({
        clientId: 'xxxxxxxxxxxxxxxxxx'
      });
    });
  </script>
</head>
v5
<head>
  <script type="text/javascript">
    var HawkSearch = HawkSearch || {};

    HawkSearch.config = {
      clientId: "xxxxxxxxxxxxxxxxxx",
    };
  </script>
  <script src="//cdn.jsdelivr.net/npm/@bridgeline-digital/hawksearch-handlebars-ui@legacy/dist/index.js" defer></script>
</head>
Search URL
Next you need to configure the URL for your site's search results page because your search bar for example is most likely available everywhere on your site and you want to make sure you redirect to that search results page where your Rapid UI results are also located.
v6
HawkSearch.init({
	clientId: "xxxxxxxxxxxxxxxxxx",
	search: {
		url:'/search-results' // Url of your site's search page
	}
});
v5
HawkSearch.config = {
	clientId: "xxxxxxxxxxxxxxxxxx",
	search: {
		url:'/search-results' // Url of your site's search page
	}
};
Test Environment Settings
The Rapid UI Framework by default points to the HawkSearch DEV environment. If you want to point the Rapid UI Framework to the Hawksearch TEST environment, you would use the following configuration:
v6
addEventListener('hawksearch:loaded', () => {
  HawkSearch.init({
    clientId: "xxxxxxxxxxxxxxxxxx",
    search: {
      url: "/search.php",		// Url to your site's search page
      endpointUrl: "https://searchapi-test.hawksearch.net"  // Url of the Search API in the Hawksearch TEST environment
    },
    recommendations: {
      endpointUrl: "https://recs-test.hawksearch.net"       // Url of the Recommendations API in the Hawksearch TEST environment
    },
    tracking: {
      endpointUrl: "https://tracking-test.hawksearch.net"   // Url of the Tracking API in the Hawksearch TEST environment
    }
  });
});
v5
HawkSearch.config = {
    clientId: "xxxxxxxxxxxxxxxxxx",
    search: {
      url: "/search.php",		// Url to your site's search page
      endpointUrl: "https://searchapi-test.hawksearch.net"  // Url of the Search API in the Hawksearch TEST environment
    },
    recommendations: {
      endpointUrl: "https://recs-test.hawksearch.net"       // Url of the Recommendations API in the Hawksearch TEST environment
    },
    tracking: {
      endpointUrl: "https://tracking-test.hawksearch.net"   // Url of the Tracking API in the Hawksearch TEST environment
    }
  };
Production Environment Settings
After configuring and testing has been completed, and you are ready to use Rapid UI in your production environment, you will need to point Rapid UI to the Hawksearch PROD environment. You can do so with the following configuration:
v6
addEventListener('hawksearch:loaded', () => {
  HawkSearch.init({
    clientId: "xxxxxxxxxxxxxxxxxx",
    search: {
      url: "/search.php",		// Url to your site's search page
      endpointUrl: "https://essearchapi-na.hawksearch.com"  // Url of the Search API in the Hawksearch PROD environment
    },
    recommendations: {
      endpointUrl: "https://recs-na.hawksearch.com"         // Url of the Recommendations API in the Hawksearch PROD environment
    },
    tracking: {
      endpointUrl: "https://tracking-na.hawksearch.com"     // Url of the Tracking API in the Hawksearch PROD environment
    }
  });
});
v5
HawkSearch.config = {
    clientId: "xxxxxxxxxxxxxxxxxx",
    search: {
      url: "/search.php",		// Url to your site's search page
      endpointUrl: "https://essearchapi-na.hawksearch.com"  // Url of the Search API in the Hawksearch PROD environment
    },
    recommendations: {
      endpointUrl: "https://recs-na.hawksearch.com"         // Url of the Recommendations API in the Hawksearch PROD environment
    },
    tracking: {
      endpointUrl: "https://tracking-na.hawksearch.com"     // Url of the Tracking API in the Hawksearch PROD environment
    }
  };
Updating Rapid UI
From time to time it may be necessary to update your Rapid UI package. We strongly recommend testing any updates in a sandbox or test environment prior to updating your production instance with your configuration and customizations. To upgrade Rapid UI:
- If sourced through the jsDelivr CDN, simply change the package version number within your page's script element referencing Rapid UI
- If sourced through npm, run the following in your root directory where your package.json file resides
npm update @bridgeline-digital/hawksearch-handlebars-ui
Embed in your Website or Application
Insert your Rapid UI code into the <head> section of your application.
Now you can call the Rapid UI components in your site.
Search Bar
The Search Bar option works like you would expect - it renders a search bar and includes Autocomplete and Instant Engage automatically. Add this where you want the search bar to appear:
<hawksearch-search-field></hawksearch-search-field>
Because the JavaScript settings are in the header, you can add this to any part of your site
Search Results
The search results include the facets and full search results.
<hawksearch-search-results></hawksearch-search-results>
Field Mappings
The default fields for things like image, name and url may not match to what you have defined in your data model. If you see for example an "empty" page of results in your Rapid UI page, it could because you need to map the fields in Rapid UI to what you have stored in HawkSearch. This code would be within:
v6
HawkSearch.init({
v5
HawkSearch.config = {
Here is an example:
fieldMappings: {
	title: 'name',
	imageUrl: 'image',
	salePrice: 'price',
	url: 'url_detail',
	type: 'content_type',
	description: 'excerpt'
},
Adding a field to a template
If there is a field that you would like to add to a template without going through the Field Mapping process you can use anywhere in the template section:
{{attributes.yourfieldname}}
Landing Page
The Landing Page is embedded and appears similarly to the Search Results section, but it does require the reference within HawkSearch to determine which Landing Page to include. That field is the Custom URL field:
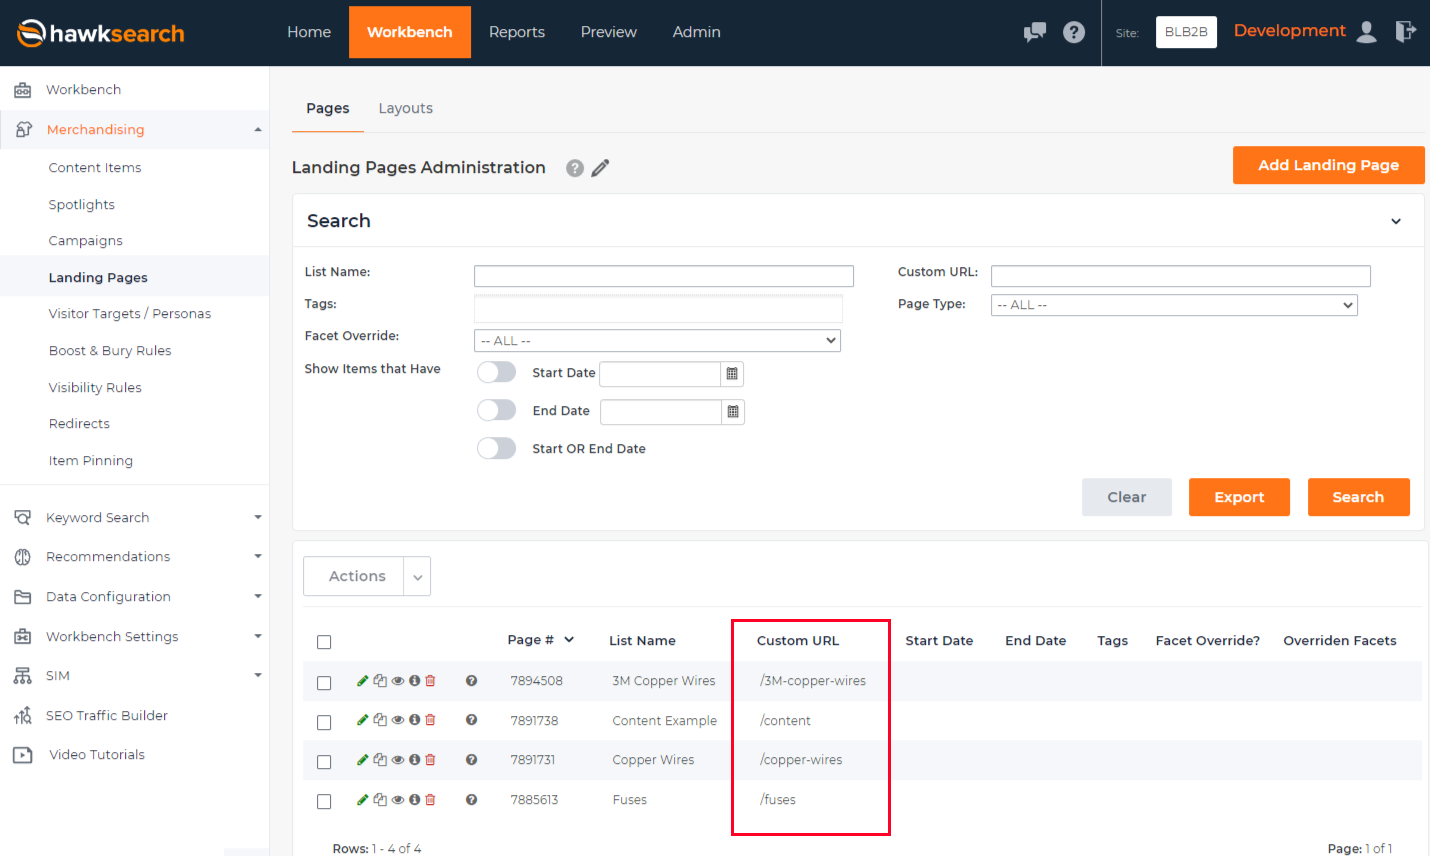
<hawksearch-landing-page url="/copper-wires/"></hawksearch-landing-page>
Recommendation
A recommendation is added like the other components. The reference to the specific Recommendation in the HawkSearch Workbench is found here using the Widget Guid:
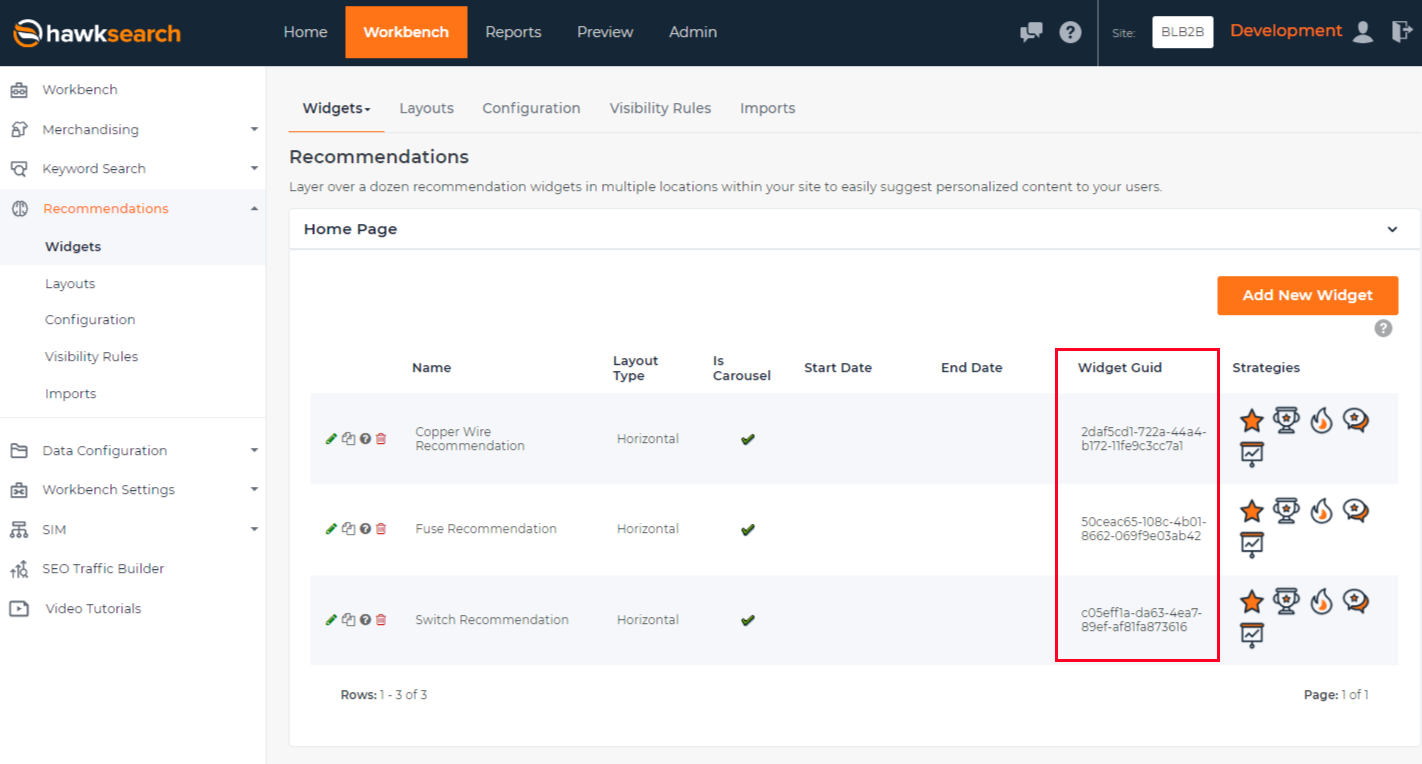
<hawksearch-recommendations widget-id="xxxxxxxx-xxxx-xxxx-xxxx-xxxxxxxxxxx"></hawksearch-recommendations>
(The widget-id used in your recommendations component must belong to the same clientId otherwise will render an empty hiden display:none; DIV element)
Rapid UI Hawksearch Config Object
If you want to learn more about how the RapidUI HawkSearch Config object is assembled, take a look at the documentation, for more in-depth information about defaults and specifications on each parameter.
Hawksearch.init({
  clientId: '',
  index: '',
  autocomplete: {
    endpointUrl: 'https://searchapi-dev.hawksearch.net',
    recommendationsEnabled: false,
    decodeQuery: true,
    minCharacterCount: 1
  },
  search: {
    endpointUrl: 'https://searchapi-dev.hawksearch.net',
    url: '/search',
    facetExclusionPrefix: '-',
    itemTypes: {
      default: 'content',
      productValues: '["item", "product"]'
    },
    queryStringMappings: {
      disableSpellcheck:'disableSpellcheck',
      page: 'page',
      pageSize: 'pageSize',
      query: 'query',
      searchWithin: 'searchWithin',
      sort: 'sort'
    },
    decodeQuery: true,
    decodeFacetValues: true
  },
  urlPrefixes: {
    assets: '',
    content: ''
  },
  recommendations: {
    endpointUrl: ''
  },
  tracking: {
    enabled: true,
    endpointUrl: 'https://tracking-dev.hawksearch.net'
  },
  variants: {
    baseFacetCountOnVariants: false,
    enabled: true,
    fieldPrefix: '',
    fieldMapping: {},
    trackUsingVariant: false
  },
  breakpoints: {},
  components: {
    'conversationalsearch': {
      string: {
        placeholder: 'Enter a message...'
      },
      prompt: {
        instructions: `
        	You are a recommendation agent, specialized in finding the perfect match for a user.
          Answer the question from the user extensivelly.
          You will be provided with an array of products as DATA.
          Create 2 suggested questions that a user could ask about this data that follows.
          Use new lines to seperate them. Make them short.
          Say something like 'Try one of these suggested questions:' followed by the questions you generate.
          Only use the information passed to you as DATA to answer the questions asked.
          Do not provide any information on amount of DATA you currently have.
        `
      }
    },
    'imagesearch-field': {
      searchOnKeyPress: false,
      searchMinCharacterCount: 10,
      searchDebounceValue: 350,
      strings: {
        placeholder: 'Describe an image you want to find'
      }
    },
    'search-field': {
      strings: {
        placeholder: 'Enter Keyword'
      },
      disableAutofill: false
    },
    'smartresponse': {
      string: {
        header: 'SmartResponse',
        noresults: 'No Results found'
      },
      prompt: {
        instructions: `
          You are a recommendation agent, specialized in finding the perfect match for a user.
          Answer the question from the user extensivelly.
          You will be provided with a user input and an array of products.
          Based on the user input and products, determine a maximum of 3 of the most relevant products based on the user input.
          Do not provide any information about amount of products you're returning.
        `,
        schema: {
          "name": "smartresponse_summary",
          "description": "Recommedation message and product details which includes name, description, url, price and imageUrl",
          "strict": true,
          "schema": {
            "type": "object",
            "properties": {
              "recommendation": {
                "type": "string"
              },
              "products": {
                "type": "array",
                "items": {
                  "type": "object",
                  "properties": {
                    "name": {
                      "type": "string"
                    },
                    "url": {
                      "type": "string"
                    },
                    "description": {
                      "type": "string"
                    },
                    "price": {
                      "type": "number"
                    },
                    "imageUrl": {
                      "type": "string"
                    }
                  },
                  "required": [
                    "name",
                    "url",
                    "description",
                    "price",
                    "imageUrl"
                  ],
                  "additionalProperties": false
                }
              }
            },
            "required": [
              "recommendation",
              "products"
            ],
            "additionalProperties": false
        	}
        }
      }
    },
    'visualsearch-field': {
      string: {
        dragImageMessage: 'Drag an image here or ',
        uploadImageMessage: 'upload an image',
        dropImageMessage: 'Drop an image here',
        errorMessage: 'Drop an image here'
      }
    }
  },
  css: {
    customStyles: '',
    defaultStyles: true
  },
  formatting: {
    cultureIsoCode: 'en_US',
    currencyIsoCode: 'USD'
  },
  placeholderImageURL: string,
  seo: {
    title: {
      prefix: '',
      suffix: ''
    }
  },
  shadowDom: true
});
Adding a Query using addEventListener
The addEventListener feature allows you to submit requests to the underlying Rapid UI framework before any requests are sent to the HawkSearch back end. A common example in the HawkSearch Search API is to pass in a Query variable that includes a specific search parameter. The example is below that will only return results where the "hierarchy" field includes the value "parent." This is added within the script area where the Config Object resides.
addEventListener('hawksearch:before-search-executed', (event) => {
  const searchRequest = event.detail;
  searchRequest.query = "hierarchy.text:\"parent\"";
  console.log(searchRequest);
});