
Plugin Configuration
Overview
This document covers the installation process for installing the Hawksearch for CloudCraze (HS4CC) App onto Salesforce Commerce Cloud B2B (CloudCraze)
Prerequisites
- Salesforce Account with supporting lightning experience
- B2B commerce 4.9 and higher
- Configured Storefront for B2B Commerce
- A signed contract or account with Hawksearch with access to login to the Hawksearch dashboard
Contact Hawksearch for Account
One of the prerequisites for installing the app is to ensure you have a Hawksearch Account you can connect the App to.
- Contact your Hawksearch Sales Representative or Account manager with the request to create a new Hawksearch account if you do not have one.
- If you already have an account then contract the Sales Representative or Account Manager and provide the following information about your account
- Engine Name
- Engine API Key
- Primary Contact Name
- Primary Contact Email
- Website URL
- Search Preview URL
- Also, provide the following information about your storefront
- Consumer Key
- Consumer Secret
- Salesforce username (for accessing to B2B Commerce and SalesForce objects using rest API)
- Salesforce password (for accessing to B2B Commerce and SalesForce objects using rest API)
- Security Token (for using with username/password from above)
- Storefront Details (Storefront code, storefront front end URLs)
- If a new engine is created in step 1 as mentioned above or you have not connected your existing engine to your Cloud Craze Administration please execute the steps below. Before proceeding further ensure you have the following information
- Engine Name
- Engine API Key
- Engine Tracking Key
Initial Setup and Configuration
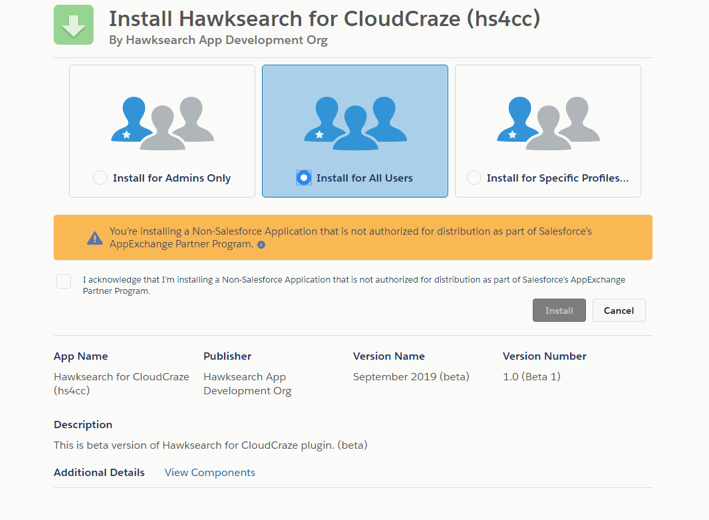
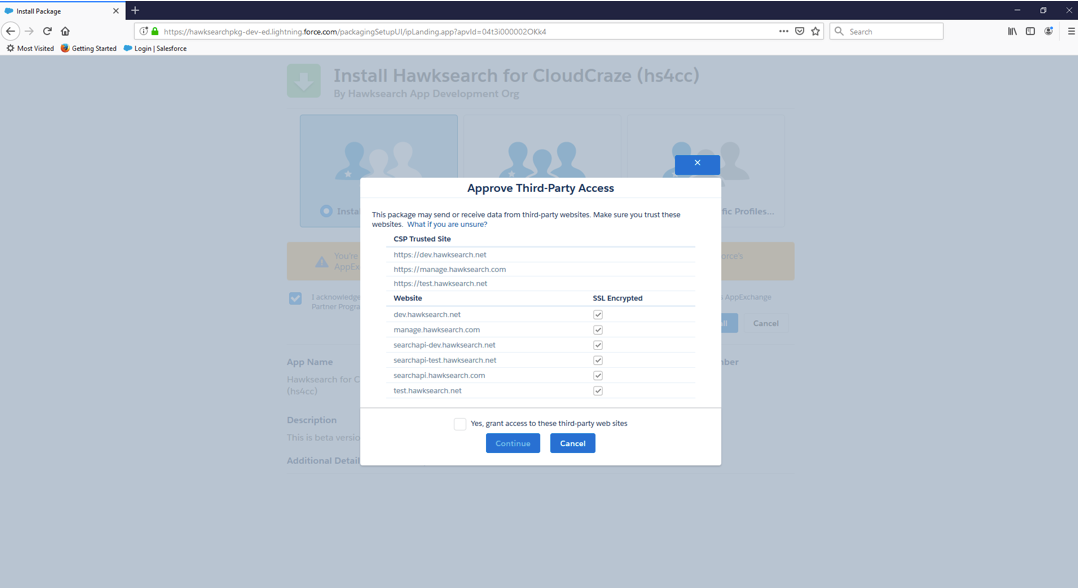
- To Install the APP use the HS2CC (v1.4) plugin installation URL below
https://login.salesforce.com/packaging/installPackage.apexp?p0=04t3i000002OM8Q
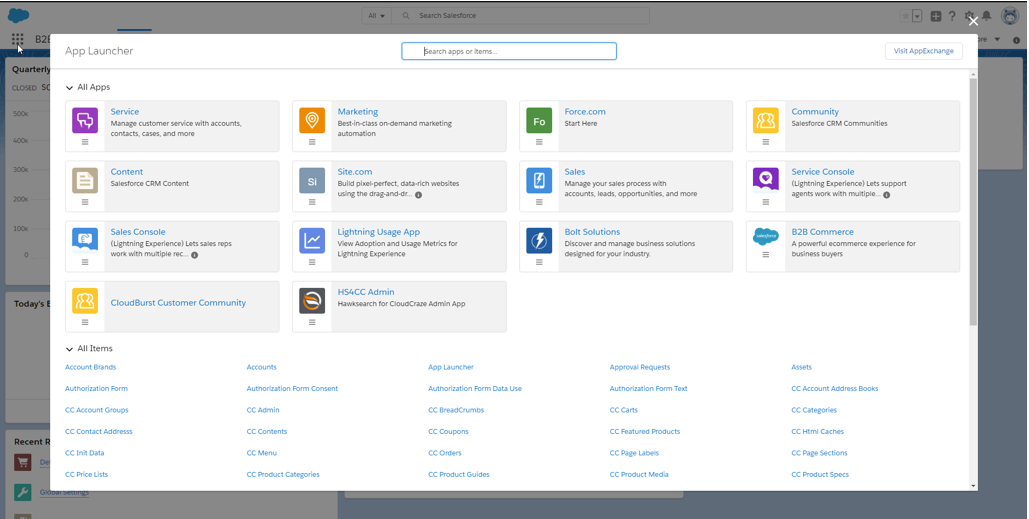
- Click on the App Launcher in Salesforce and find the HS4CC Admin App as shown below
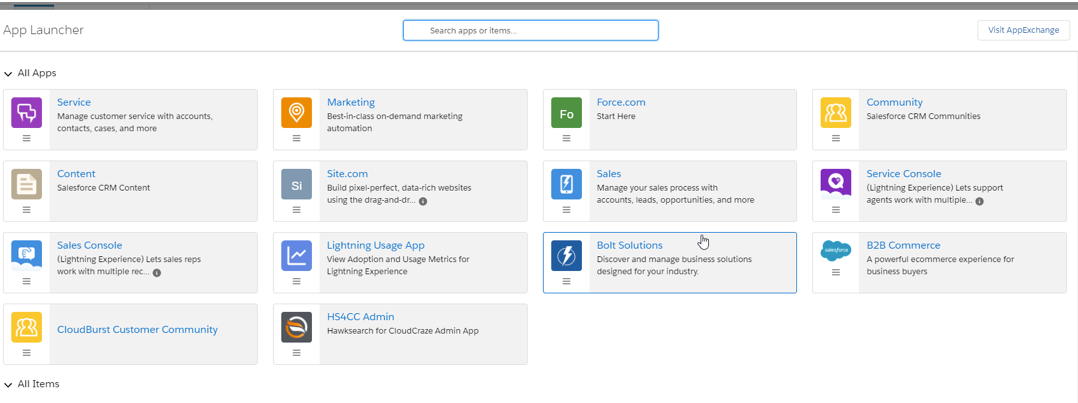
- Click on the App and open it
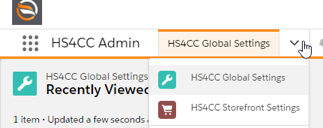
- Click on the HS4CC Admin Menu and then select “HS4CC Global Settings” From the dropdown.
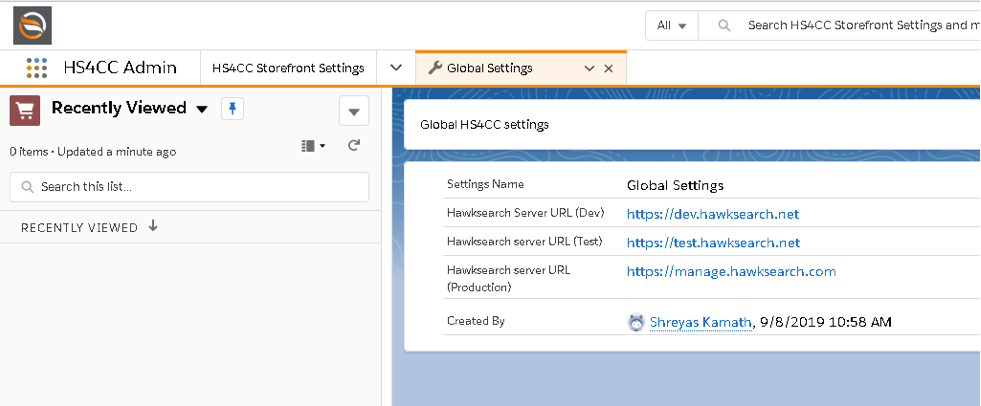
- Click “New” to create a New Record and enter “Global Settings” in Settings Name Field. Then Click “Save”
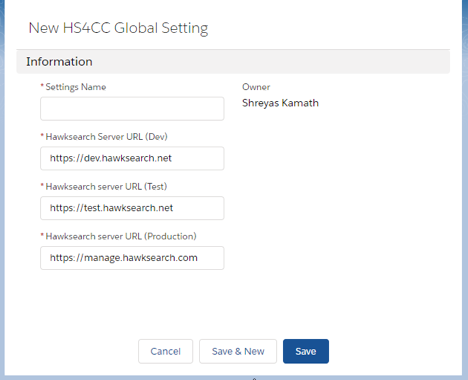
- You should see a screen similar to the below:
Create API Keys for using REST API calls
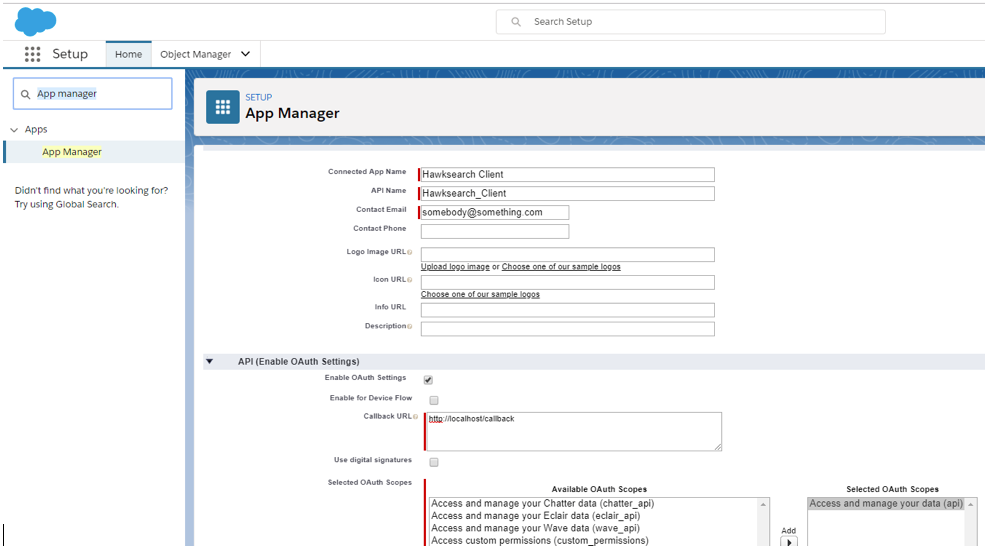
From the gear icon in the top-right, navigate to Setup. From the ‘Quick Find’ box on the left, type in “App Manager” and select the menu item with the same name. On this screen, you will see a number of pre-built connection points. Let us add our own by selecting “New Connected App” in the top-right.

Enter the following information and click “Save”:
Connected App Name: Hawksearch Client
API Name: Hawksearch_ClientContact
Email: <enter_your_email_address_here>
Enable OAuth Settings: checked
Callback URL: http://localhost/callback
Selected OAuth Scopes: Access and manage your data (api) (or full access)
- This step takes a few minutes to complete. You should receive an email once the setup is complete from salesforce
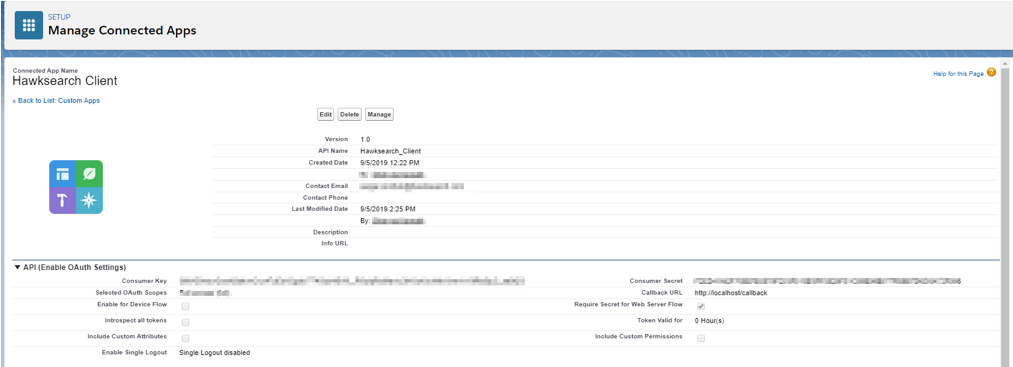
Note
The “Consumer Key” and “Consumer Secret” listed on the app screen below.
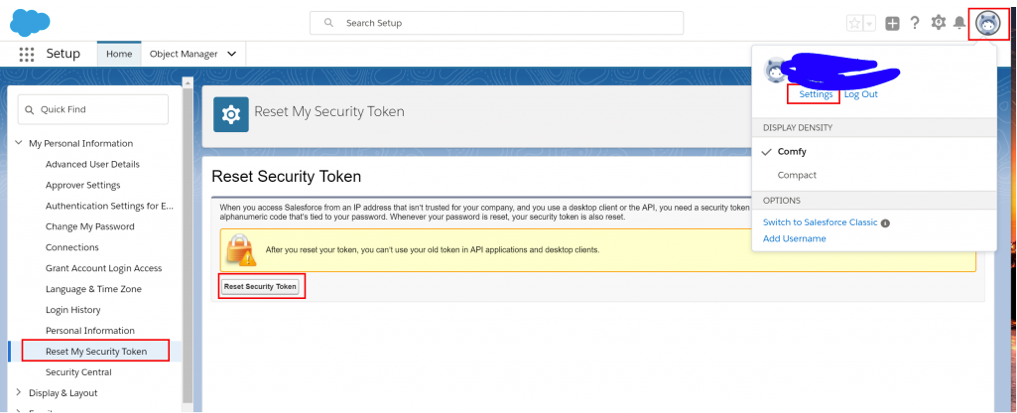
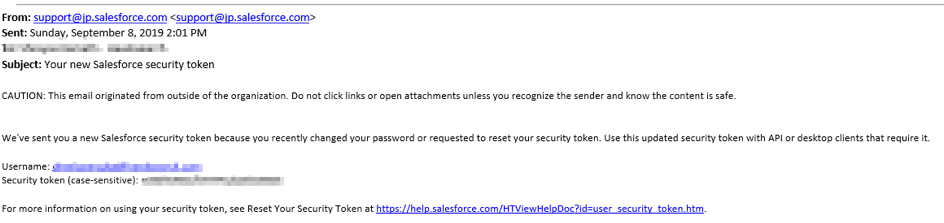
- The final piece of information you need is a security token. Navigate to the profile settings section (see below) and click on the “Reset My Security Token” (NOTE: It may take additional time until “Reset My Security Token” will become available after the previous step. If you do not see this option please wait a few minutes and refresh the screen again). Complete the instructions steps on this screen to obtain a security token. Once completed you will receive an email with “Security Token”.
Finalize HawkSearch App configuration in Salesforce Admin
- Click on App Launcher inside Salesforce console
- Select HS4CC Admin and click on it
- In the HS4CC Admin menu, select HS4CC Storefront Settings from dropdown
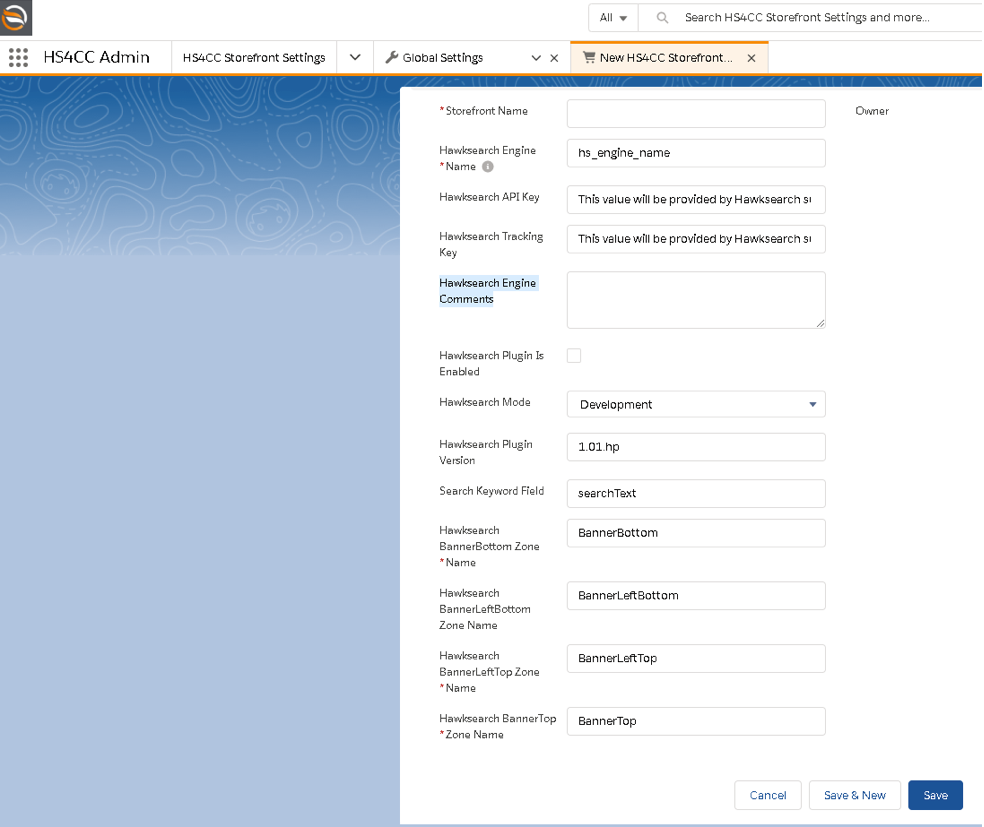
- Enter Storefront name (based on B2B Commerce CC Admin), for example, DefaultStore
- Enter provided by Hawksearch Engine Name
- Enter provided by Hawksearch API Key
- Enter provided by Hawksearch Tracking Key
- Hawksearch Engine Comments for your reference (if needed)
NOTE
If you need to use Hawksearch for multiple storefronts, repeat these steps
Cloudcraze Admin Configuration changes
Important
The following instructions are to be used for the standard B2B Commerce for Visualforce (Cloudcraze) template only. For custom sites or different templates, please contact HawkSearch before proceeding with these changes.
- Open the B2B Commerce app from the menu icon on the top left part of the page:
NOTE
Confirm that the app HS4CC Admin is present. If absent, the installation has not completed yet or there was an error while installing the app, please check your permissions or contact your Salesforce administrator if the problem persists.
- Click on B2B Commerce App and go to CC Admin tab. alternatively, click the CC Admin link under All Items
- Select your storefront using the dropdown menu on the top right as shown in screenshot below:
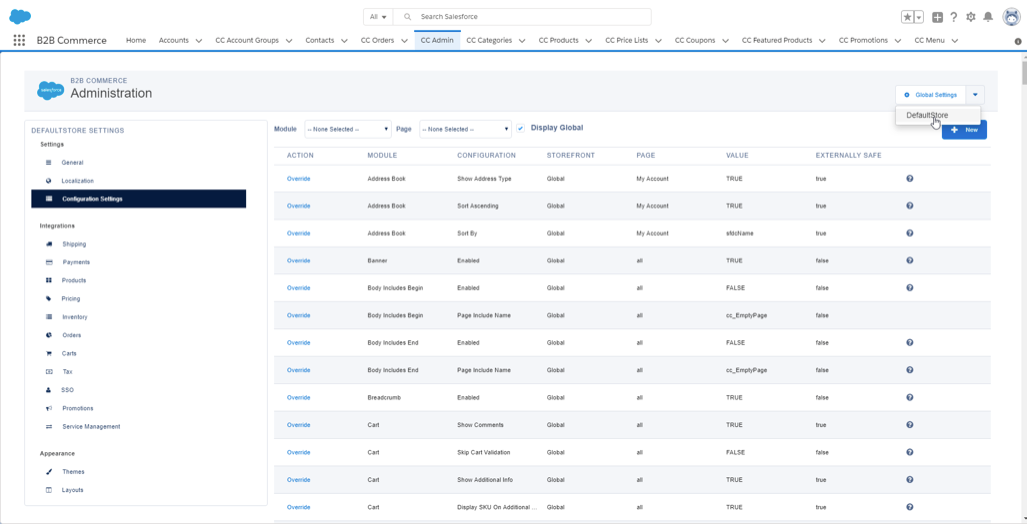
- Keeping the checkbox checked for Display Global, select “Header Include Begin” under MODULE.
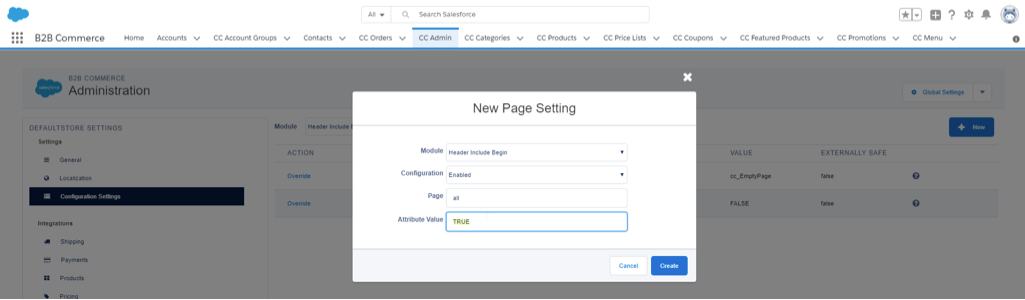
- Click the Override _link for “_Enabled” configuration.
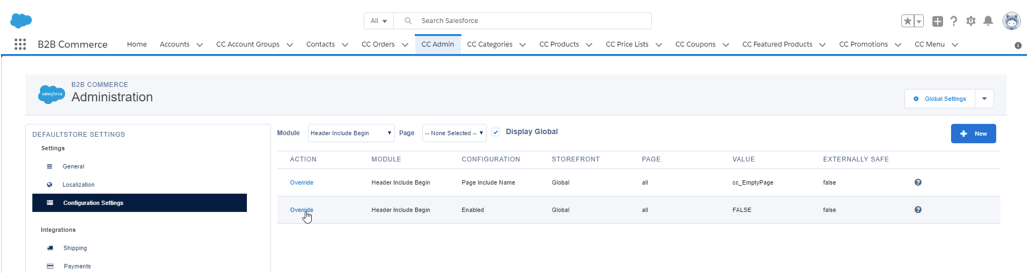
- Select Page as all and set Attribute Value to TRUE.
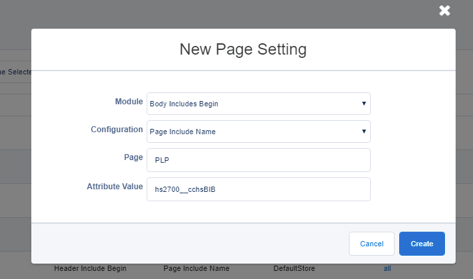
- Click the “Override” link for “Page Include Name” configuration.
- Select Page as PLP and set Attribute Value hs2700__cchsHIB.
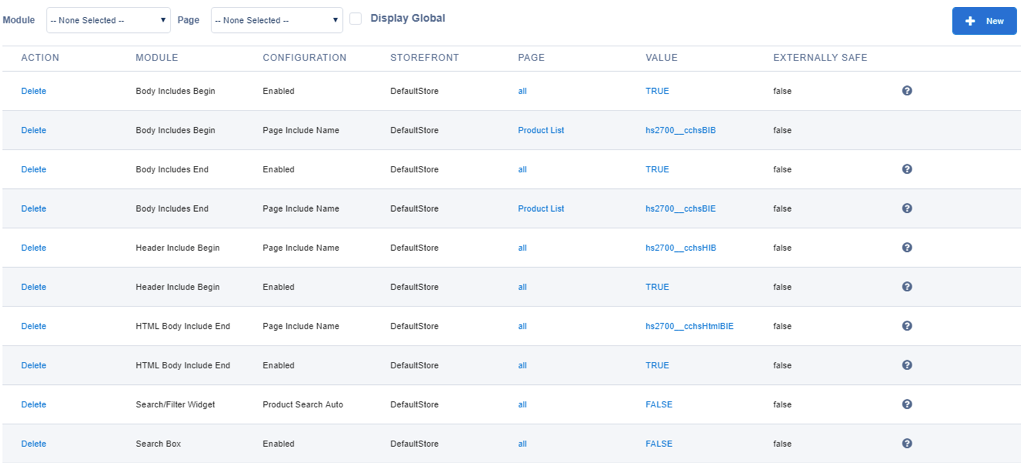
- Repeat Step 3 to 8 for each of the following sections:
- Body Includes Begin
- Body Includes End
- HTML Body Includes End
- Search/Filter Widget
- Search Box
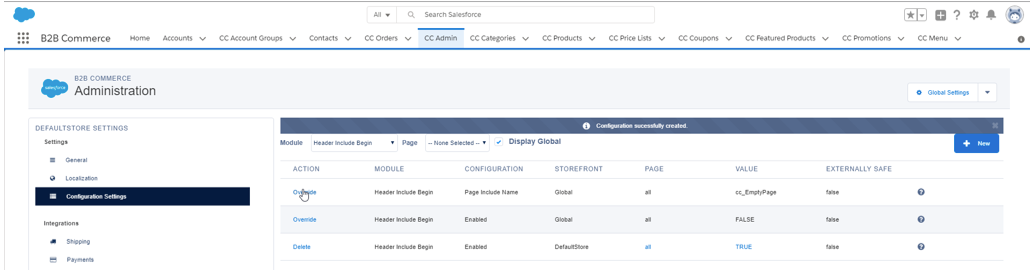
Each of the sections above will need to be configured as per the settings shown in the screenshot below
- Go to Configuration Cache management under Global Settings and rebuild cache.
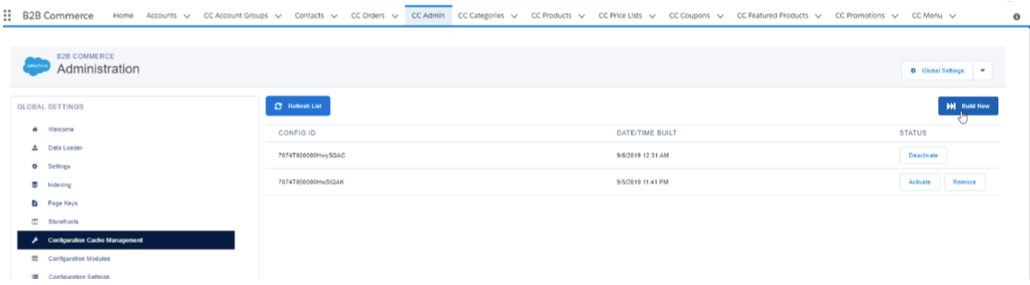
- Ensure latest cache has been activated.
Updated 12 months ago